Setting up Git and Unity (Workflow Guide)
February 05, 2020
Introduction
Git is a highly versatile and powerful tool for source control and collaboration, which makes it incredibly useful for Unity development. If you're unfamiliar with this, here are some use cases I can think of off the top of my head:
- If you have multiple computers, (say, a laptop and desktop) and want to work on a project using both of them, while having the project files synced between them
- If you're working on a project with a partner or group, and want a way to sync your work without uploading and downloading a million files to Google Drive or Dropbox
- If you want a log of previous versions of your project and some way to revert to them, or implement experimental features that might break your code
If any of these apply to you, read on!
Setup
This is going to go over setup for Windows machines only, as I'm not familiar with Mac OS and I wouldn't dare try this on Linux for fear of breaking my distro (again) so you'll have to hack this guide to work on your system if it's not running good ol' Windows 10.
If you don't have Git installed:

You can download the Git installer from https://git-scm.com/downloads For your operating system of choice. You can leave the installation settings as the default, just make sure **Windows Explorer Integration > Git Bash Here **is enabled. This will make everything a lot easier and brings back the "Open a command window here" option when using the context menu in Windows explorer.
If for some reason you don't have Unity installed:
Also, I'm assuming you have Unity installed. The latest version, as of now is 2019.3.0, and this link wil ltake you to the default installer for Unity Hub, which can manage your Unity versions across a device and is overall a nice addition to the Unity workflow.
File Structure
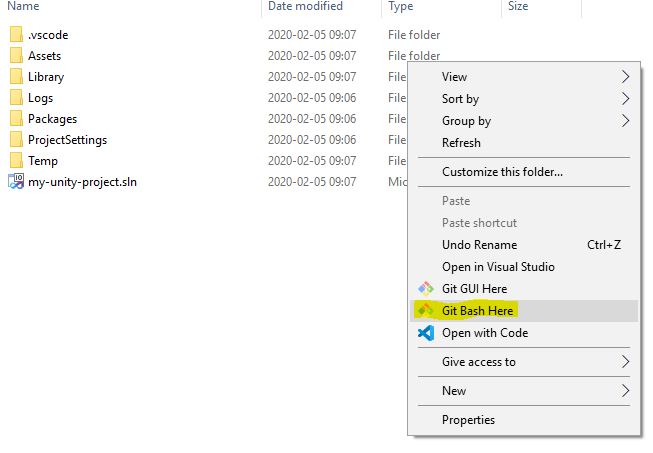
This is what a new Unity Project looks like. The _.vscode file _is generated as I've set VSCode as my editor, so you may not have this. Additionally, if you've been working on your project for a while, you might have other folders and files.

To set up a repository, which is basically a designation for Git to be able to work with your project, you'll have to open a command window (or a Git Bash window, which is a slightly more advanced command prompt) by right clicking anywhere in the directory and selecting Git Bash Here.
In the command window, you'll have to type git init to initialize a git repository in the current directory (given by the path at the start of a line, which is wherever you opened the git bash).
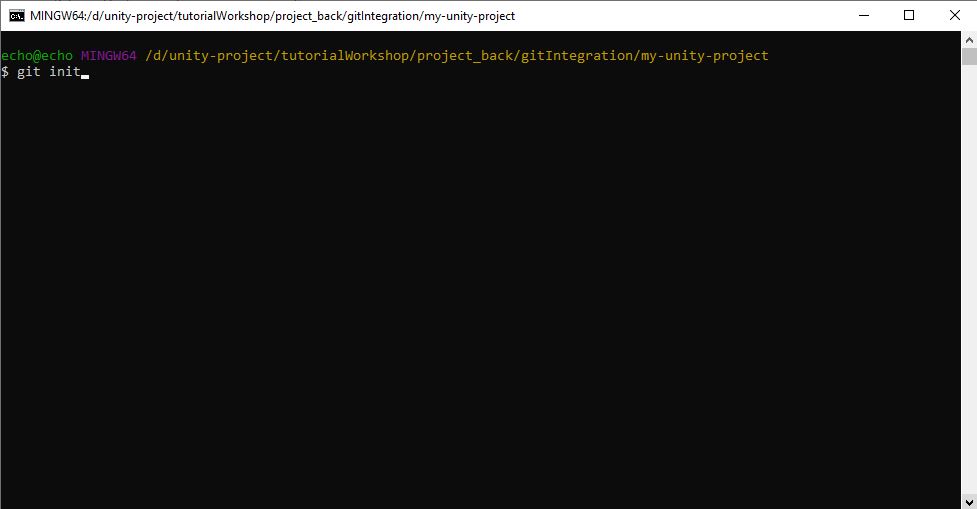
Then, hit **enter **and a bit of text will show up, saying what has been done. It should read Initialized empty Git repository in
Also, if you have hidden files showing (**View > Hidden Items in the File Explorer), **you'll notice a new folder, called .git, has been created.
The Gitignore
The gitignore file tells git what filetypes to exclude when working with a project. Since Unity generates a lot of random files that you won't want to track and are overwritten constantly, as well as many cache files, you'll want to tell git somehow that we don't care about these files. If you deleted them while working on a project, they'd just be autogenerated as soon as we restarted, which is a fact we're banking on here. To ignore these files, you'll need to specify their types and place them in a gitignore file.
The easiest way to do this is to get the Git-endorsed Unity GitIgnore from here:
https://github.com/github/gitignore/blob/master/Unity.gitignore.
Then, you can copy the file's contents into a new text file (just make one with notepad) and save it as Unity.gitignore in the same folder we've been using, containing your and </.git> folders. Alternately, you can download the whole repository here and then just drag and drop the file that you want. Unfortunately, Github doesn't allow downloading of part of a repository, so you'll have to grab the whole lot and unzip it.
Now we've got a git repository set up on our local machine, so we'll have to back it up to the internet via Github.
Github Setup
First, make sure Unity is closed when you do this.
Create a Github account if you don't already have one here, and create a new repository to house your unity project. These are the default settings. Give a meaningful name and description tailored to your project, and don't change the settings, especially those under ("Skip this step if you're importing with an existing repository"). We can't add a Unity gitignore here as we'd be unable to sync this with our local folder.
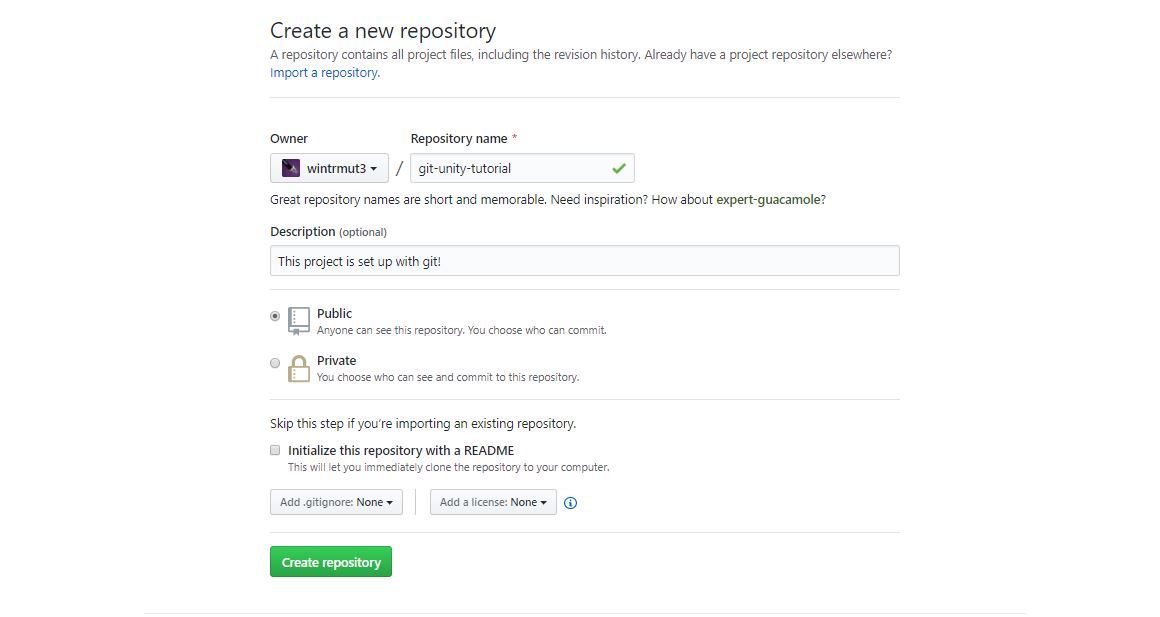
Github helpfully provides us with some useful instructions here:

We're going to have to make a few minor changes to the second one - as we're going to be pushing a repository that already exists (that we've just created on our local drive). Let's go through this code line by line:
git status git add -A git commit -am "First commit" git remote add origin <Your git url, don't copy mine> git push -u origin master
**git status **tells us what files our repository is currently keeping track of. Since we've just initialized it, it isn't tracking anything at all, which we can add with:
git add -A : this lets us add ALL of the untracked files to our project, in a step known as staging. It tells git that it should watch those files (all of them, in our case) to see their changes and keep track of them. You can also add files or folders one by one with "git add your-filename-here" but this is impractical, and pointless unless you really want to work on your typing speed. This may take a while the first time, as we're adding all of the files in our project. Also, you can ignore the warnings here too. **If Unity is still open, this will fail! **
git commit -am "your-message-here" : **Committing files is how we tell git to log the files we've changed. We're basically updating the files in our repository with the new, changed ones. **-am **tells us that we're 1) commiting **all **the files, and 2) attaching a **messsage, which we put in quotation marks afterwards. This is sort of like leaving a comment, as to what you've changed so you have a log of this for your future self.
**git remote add origin
**git push -u origin master **tells us to update the files in the remote repository (our empty github repository) with the files in our local repository. We won't be concerned about branches here, which is what the **master **means. We're pushing our files to **origin, **which is the remote we set up in the last step. The **-u **means that we're setting our origin as an upstream source, which doesn't really mean anything for now and is only necessary the first time you do this.
You can copy paste all these things once you've replaced the message and URL or just type them in yourself.

The final output, after you push to origin, should look like this.
Now, when you refresh your github page in your browser (**F5), **you'll see that our changes from our local drive have magically been backed up here!

To access these files in another computer, you'll have to install git **as we did previously. Create an empty folder and then open the git bash in it by right clicking and selecting **git bash here.
Then, to tell git to sync the files with your Github repo, you'll want to **clone **the git repository by using **git clone
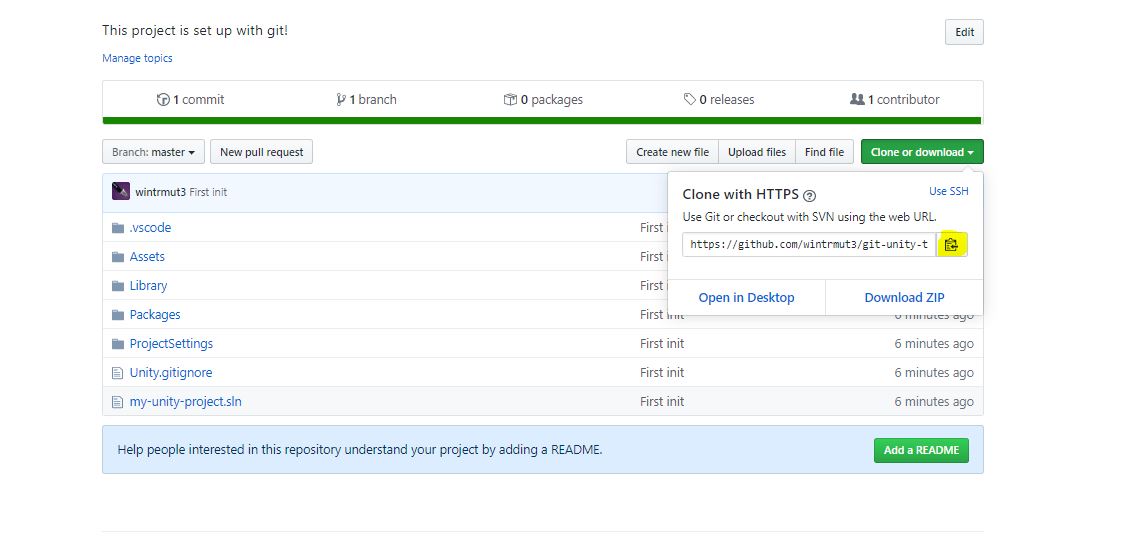
You can copy the URL by selecting **Clone or Download **and then clicking the highlighted button to copy it. To paste in git bash, you'll have to use **shift+insert, **not ctrl+v.
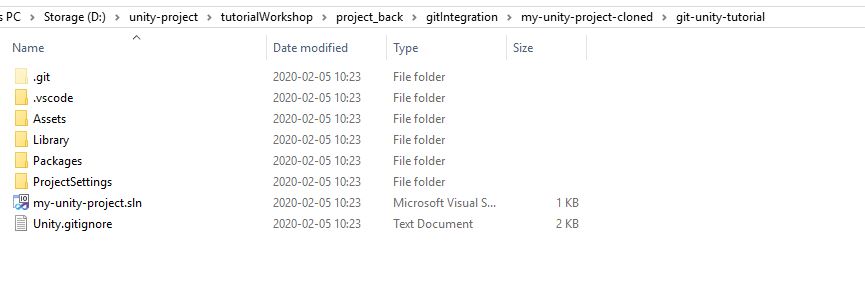
If successful, you'll see that the exact files from your other drive have been copied here. Our project now exists on two separate repositories on two separate computers or directories, and we can now work on it on both.
Workflow
Now, let's go over how exactly to maintain this now that the setup is complete.
First, we can only make changes on one system at a time. There can only be two different versions that exist of the repository at a time - an old one and the one you're working on right now.
You can't create two different "new" versions at a time, because then neither you nor Git knows which one is the current one. It's like making a document and having one rough draft and two final versions. It doesn't make sense, and isn't possible without branches (beyond the scope of this guide). Be careful to only work on this on one computer at a time, and sync changes as soon as you're done.
Let's call the computers we're working on desktop computer **Alpha **and laptop computer **Gamma **for short.
We're going to start working on Alpha, and we'll fix a small bug in our code or add a new art asset. Once we're done, we'll run the following commands:
git add -A git commit -am "your-message" git push
Notice that this is essentially the same as the setup, except now we don't need to specify we're setting our origin or that we're pushing to origin, as that is the default. We're just adding and tracking all changes, adding a note-to-self, and then updating our remote repository on Github.
Every time you push, you'll see that Github has updated, and you can check out the changes there.
Note: Files larger than 100mb require GitLFS setup, which is a whole other topic you may want to search up, but I've never run into this issue, except with final builds. Don't upload builds!
**Additionally, **Git is not really designed to handle binary files (non-human readable files) that Unity dumps out in the gigabytes. LFS can track binary files in a way that doesn't require a rewrite every time they're slightly changed, so you may want to look into LFS for your projects. Also, large texture, mesh, and audio files may require LFS. It's not ideal to use Git without Git LFS for large projects, but for small 2D games it should be sufficient, if suboptimal.
Get Git Large File Storage (Git LFS) here: https://git-lfs.github.com/
Then, let's say we're going to work or something and want to take laptop Gamma **with us. To copy the changes from Github (transmitted from **Alpha), we can simply use
git pull
to sync our local changes with what's been changed on **Alpha. **Now our two versions are exactly the same as the one on Github.
Once we've made changes on Gamma, say adding a music file and squashing a couple more bugs, we're going to run
git add -A git commit -am "your-message" git push
again, this time on **Gamma's **repository folder. Then, the changes from **Gamma **are syncted to github. We can then
git pull
on **Alpha **to sync changes and start working there again once we get home, or continue working using **Gamma. ** Make sure to add, commit, and push changes before switching machines, so as to not have three different versions at once (github, alpha and gamma). Two of them should always be the same version, and one should be the active one which is being worked on.
Now, we repeat this process whenever working on our game.
Conclusion
Git can be extremely useful when working with a Unity project, but it may be a bit scary to set up at first. Hopefully this guide has explained the process fully, and you're able to use Git, Github and Unity to improve your workflow! If you liked this tutorial, check out some other ones or share it on social media! I'd really appreciate that. If you're having problems, you can leave a comment below.