A Guide to Making a Robot Character in Blender: Modelling Details
January 17, 2020
In this tutorial, we're going to add some details to our robot character in Blender. We'll be learning how to efficiently create connecting cables, vents, beveled edges, and armor plating, along with other surface details.
We'll be making extensive use of these modifiers and tools in this tutorial.
- Bevel tool
- Knife tool (+ Knife Snapping)
- BoolTool addon
-
Bezier Curves
This is the third tutorial of four in the series. To check out the other parts use these links:
- Modelling I
- Rigging (Using IK)
- Modelling II (Details & Kitbashing)
- Materials and Environment Setup
Video Tutorial
Text Tutorial
Setup
Start by resetting the armature and hiding it. Go back to object mode and hit H with the armature selected, or click the eye beside it in the overview.
We won't be covering animation in this tutorial series, but if you are planning on doing so, please reset the armature if it has been manipulated. Go to pose mode (Select the armature and Ctrl + Tab) and reset the position (Alt+G) and rotation (Alt-R) of the bones.
Tools
Bevel
The first tool we'll be using is the bevel tool.
This splits an edge into a face and angles it to be roughly parallel to the weighted average of the two normals of the faces it joins times their dimension.
For example, with two identical faces at 90 degrees like a book endstop, beveling the edge that joins them will create an additional face at 45 degrees to both.
For our use, we want to make two loop cuts (Ctrl+R) and then bevel the middle one to create the effect shown below.
This effect can be seen in industry all the time. There are really no truly sharp 90 degree angles in nature or manufactured objects. Sharp edges fail easily as they concentrate force at the edge, so we round out the angles and edge to compensate.
Knife Tool
Blender's Knife tool is essential for any modeler. It allows you to cut faces and subdivide them. We'll be using this tool to create armor details.
To create armor plates, we could create a grid of loop cuts and then manipulate the vertices on it (quick tip - If you want to move an edge along a face that doesn't lie along a major plane (XY, XZ, YZ), you can use the edge slide (Ctrl + E > Edge Slide) tool).
Alternately, we can use the knife tool to cut out the outline of the shape, and then extrude it outwards or inwards.
You'll want to do this flat against a plane so hit Numpad1 for front view, Numpad3 for side view, or Numpad7 for top view. Then, hit Numpad5 for orthographic view (all parallel lines remain parallel and don't converge at a point). Then, you can start manipulating the mesh in a clean environment. If you don't have a numpad (eg. you're on a laptop), you'll want to go to Preferences > Emulate Numpad and then use the top row numbers to do these view manipulations.
Hit K in edit mode to access the knife tool or select it from the sidebar. Then, click where you want to start outlining the cut, and hit C to turn on snapping at 45 degree intervals.
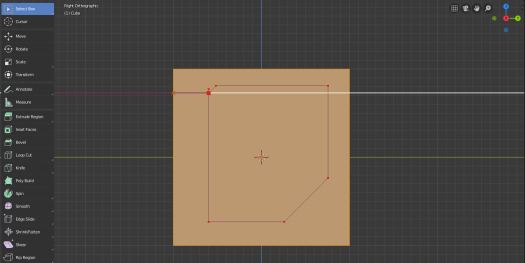
Snapping shows up as a white line.
Once you're happy with the shape (and I suggest you check out some real world reference images for this), you should hit Spacebar to finalize your cut. Now, the geometry of your model has changed! This is a cut we can extrude or inset or edit as we wish, and construct detailed armor plates with. Do not click RMB (Right mouse button) or you will lose your cut!
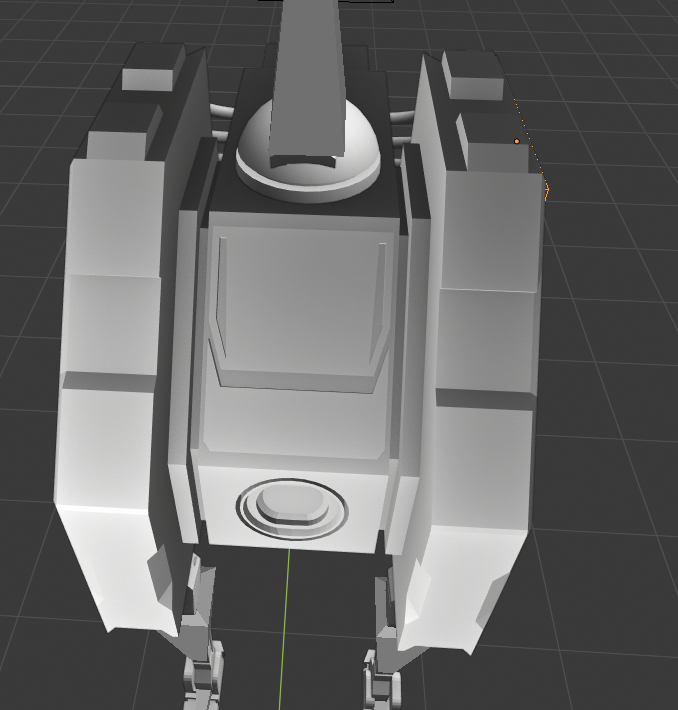
This technique is used to generate the armor plate sections on the top of the mesh by extruding cuts outwards.
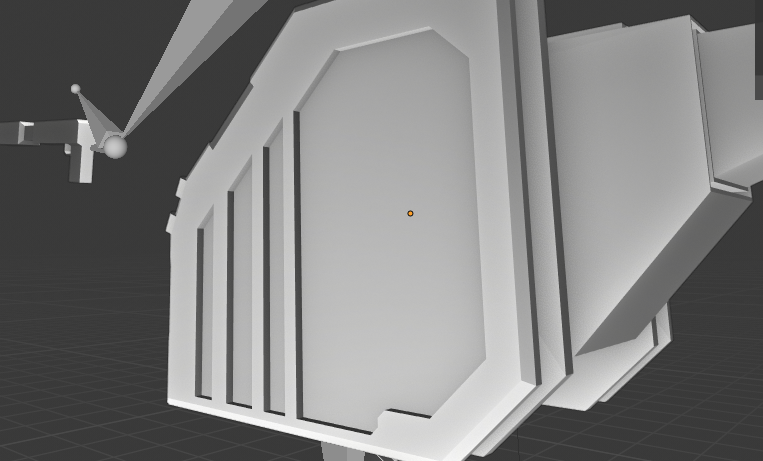
You can also generate cuts like this with effective use of snapping and extruding inwards.
Boolean Tool (BoolTool) + Array + Proportional Editing

The boolean modifier allows you to do some pretty cool things, like create these vent sections. Doing this with the knife tool would take forever, and instead, we can use a clever combination of Booleans, Arrays and Proportional editing to create this.
The BoolTools addon (Enable in Preferences > Addons > BoolTool) if it doesn't show up when you hit Ctrl+Shift+B. It simplifies the process of working with boolean objects. Essentially, we're going to be cutting out a shape from our larger mesh. Since our "cutter" shape is regular and repeating, we can simply use an array modifier to repeat it.
I'm just using a narrow rectangular prism section and applying a vertical array modifier to it.
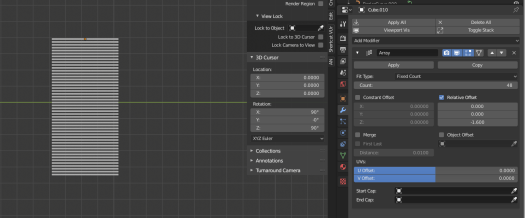
These are the array settings used.
If you wanted to change the shape, you can apply the array modifier and edit the array with proportional editing (O), and play with the falloff settings while dragging a corner of the mesh. For this robot, we may use the linear setting to create an angular section.
Then, you want to position this cutter object over the object to be cut (our chassis model) with them intersecting to the depth of the desired cut, like this:

We can then apply the bool tool with Ctrl+Shift+B > Brush Boolean > Brush Difference to execute the cut. We can also move around the brush to move the cut.

Bezier Curves
This part of the tutorial is highly visual, and I suggest you watch the video.
We're going to be making cables with bezier curves (Shift+A > Curves > Bezier) which are useful for making nonlinear components. These data cables are curves.
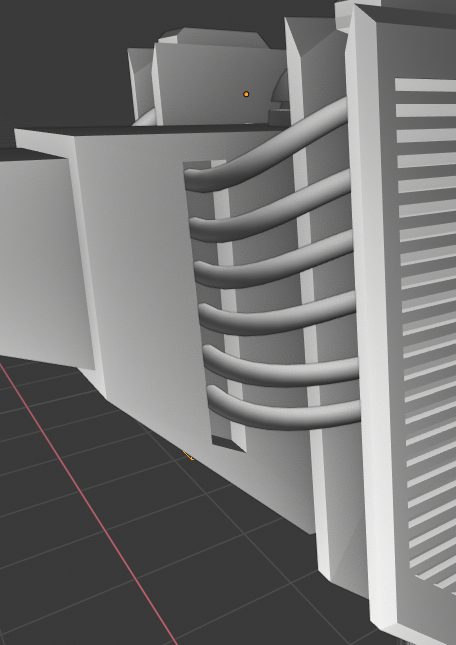
We can manipulate the curves by extruding and scaling the ends like a normal mesh, and again I suggest watching the video for this.
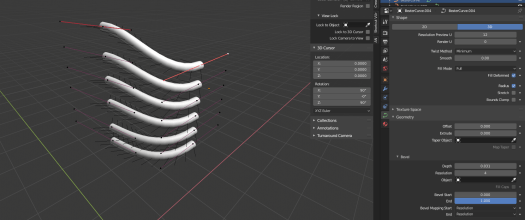
This is what it looks like alone. In the curve settings, you want to change in particular the bevel depth setting so the curves have a nonzero thickness. Then, you should try to get a feel for the geometry, or watch the video.
For a robot character, you should think about where the curve details should be. Perhaps the legs are operated by a hydraulic system, so you'll need some flexible pipes for those, and of course data and power cables to everything that might need it. Make sure that these are coherent and make sense, and don't place curves randomly! This makes it messy and obscures the sense of character in a lot of chaos.
Conclusion
Adding detail is really important! It adds a sense of life, character, and mechanical possibility to a model. There are many useful tools and modifiers in Blender to add modelling details to a robot character, but you should be careful to think through these specific details and make sure they fulfill a specific function and accentuate that, and avoid putting details in randomly or thoughtlessly.
Final Exercise
Check out some robot modelling inspiration from a simple google search and see if you can find elements of detail that stick out to you. Perhaps there's gears that fit exactly together, cables that have labels on them with their function, status indicators, screws and bolts, or anything else, and try to bring that into your own model.
The point of this tutorial is not to give you steps to follow exactly, but rather to provide the tools to build something unique yourself! Have fun and good luck.